
Troubleshooting
- BiSlide®
- UniSlide®
- XSlide™
- Rotary Tables
- Controllers
- Readouts
First - always read the Users Manual.
You are also welcome to call us, should you encounter issues you cannot resolve on your own.
BiSlide Stage Troubleshooting
First - always read the Users Manual.
| Symptom | Possible Cause | Possible Fixes |
|---|---|---|
| The carriage binds or will not move. | During mounting, the base may have been over-tightened or mounted to an irregular surface. This can distort the assembly, causing carriage binding. | Loosen screws and re-tighten to the proper torque. |
| Tighten bolts in cleats to 95 in-lbs. | ||
| Remount base to a flat surface. (Recommend: Mounting surface should be steel or aluminum and have 1/4-20 UNC threaded holes with a minimum thread depth of 0.30".) | ||
| Mounting non-flat plate or blocks to the carriage to hold the load can also distort the assembly, causing carriage binding. Anything attached to the assembly must be mounted flat to the carriage. | Use the "finger test" to check for binding. Grasp the lead screw on either side of the carriage and twist. If the lead screw can't be moved, the slide or the load may not be mounted properly or the mounting bolts are too tight. (CAUTION: Over tightening will increase friction, could stall the motor and cause increased wear.) | |
| There is some backlash in the carriage on a motorized BiiSlide. | Some backlash maybe seen when the lead screw and carriage start to wear. | Adjust by tightening the Allen cap screw on the top of the drive nut. (CAUTION: Over tightening will increase friction, could stall the motor and cause increased wear.) |
| Use the "finger test" to check for binding. Grasp the lead screw on either side of the carriage and twist. If the lead screw can't be moved, the slide or the load may not be mounted properly or the mounting bolts are too tight. | ||
| There appears to be free-play on a motorized BiSlide. This may be accompanied by a clunking/knocking noise when pulling up and down on the corners of the carriage. | Objectionable play can be reduced by tightening the four carriage fit bolts on the carriage surface. | Adjust each bolt equally a maximum of 1/8 of a turn. (CAUTION: Over tightening will increase friction, could stall the motor and cause increased wear.) |
| Carriage appears to be at a slight angle and out of parallel with the base. | ||
| The limit switches are failing. | An out of parallel carriage may angle the limit switch actuator cam to be either too high or low resulting in limit switch failure. | |
| The carriage seems to clunk when pulling and pushing on one diagonal of the carriage. | The Carriage Fit Bolts may not have been tightened equal. | Back off on slightly on the adjustment bolts on the opposite diagonal and re-tighten all 4 bolts equally to 1/8 maximum turn. Use a level and check for parallelism to the base. (See User's Manual.) |
UniSlide Stage Troubleshooting
First - always read the Users Manual. Comments can also apply to UniSlide Pre-configured XY Tables.
| Symptom | Possible Cause | Possible Fixes |
|---|---|---|
| The carriage binds or will not move. | During mounting, the base may have been over-tightened or mounted to an irregular surface. This can distort the assembly, causing carriage binding. | Loosen screws and re-tighten to the proper torque. Mount the base using screws to the following torque: |
Motorized UniSlides: • MA1500 Series 1 ft. lb. |
||
| • Remount base to a flat surface. | ||
| Mounting non-flat plate or blocks to the carriage to hold the load can also distort the assembly, causing carriage binding. Anything attached to the assembly must be mounted flat to the carriage. | Re-mount load flat to the carriage or use a Velmex adapter plate designed to carry the load. | |
| Mounting screws holding payload to carriage may be too long and screwed into lead screw causing damage. | Re-mount load using a shorter screw length that does not extend past the carriage or use a Velmex adapter plate designed to carry the load. | |
| If the distortion is still present and the carriage still binds contact Velmex Application Engineers. The carriage and/or the lead screw may need to be replaced, or the Assembly may need to be returned on an RMA for repair. | ||
| There is some backlash in the carriage on a motorized UniSlide. | Some backlash maybe seen when the lead screw and carriage start to wear. | Adjust by tightening the Allen cap screw on the top of the drive nut. (CAUTION: Over tightening will increase friction, could stall the motor and cause increased wear.) |
| Use the "finger test" to check for binding. Grasp the lead screw on either side of the carriage and twist. If the lead screw can't be moved, the slide or the load may not be mounted properly or the mounting bolts are too tight. | ||
| There appears to be side play on a motorized UniSlide. | Objectionable side play can be reduced by tightening the adjustable expansion gibs that control the fit of the carriage. | Adjust the set screws located at the ends of the carriage. (CAUTION: Over tightening will increase friction, could stall the motor and cause increased wear.) |
| The limit switches do not appear to stop the carriage. | The limit switch collars must be set sufficiently distant from the ends of the Assembly to avoid collision with the end plate or limit switch cover. The carriage stopping distance is dependent on the speed just before limit switch activation. | Set the collar position for the maximum anticipated carriage speed. |
XSlide Stage Troubleshooting
First - always read the Users Manual.
| Symptom | Possible Cause | Possible Fixes |
|---|---|---|
| The carriage binds or will not move. | During mounting, the base may have been over-tightened or mounted to an irregular surface. This can distort the assembly, causing carriage binding. | Loosen screws and re-tighten to the proper torque. |
| Tighten bolts in cleats to 17 in-lbs. | ||
| Remount base to a flat surface. (Recommend: Mounting surface should be steel or aluminum and have 6-32 UNC threaded holes with a minimum thread depth of 0.250) | ||
| Be sure to use the proper number and placement of cleats. (Refer to the users manual.) | ||
| Mounting non-flat plate or blocks to the carriage to hold the load can also distort the assembly, causing carriage binding. | Anything attached to the assembly must be mounted flat to the carriage. (CAUTION: Over tightening will increase friction, could stall the motor and cause increased wear.) | |
| Use the "finger test" to check for binding. Grasp the lead screw on either side of the carriage and twist. If the lead screw can't be moved, the slide or the load may not be mounted properly or the mounting bolts are too tight. | ||
| There is some backlash in the carriage on a motorized XSlide. | Some backlash maybe seen when the lead screw and carriage start to wear. | Adjust by tightening theset screw in the side of the carriage (CAUTION: Over tightening will increase friction, could stall the motor and cause increased wear.) |
| Use the "finger test" to check for binding. Grasp the lead screw on either side of the carriage and twist. If the lead screw can't be moved, the slide or the load may not be mounted properly or the mounting bolts are too tight. | ||
| There appears to be free-play on a motorized XSlide carriage. | Objectionable play can be reduced by tightening the two carriage fit bolts on the side of the carriage surface. | Adjust each bolt equally a maximum of 1/8 of a turn. (CAUTION: Over tightening will increase friction, could stall the motor and cause increased wear.) |
| Carriage appears to be at a slight angle and out of parallel with the base. | ||
| The limit switches are failing. | Could be caused by a bad switch, the cable not plugged in correctly or the controller not set-up properly. | Check the cable connections. Check to be sure the controller is configured correctly. |
Rotary Table Troubleshooting
First - always read the Users Manual.
| Symptom | Possible Cause | Possible Fixes |
|---|---|---|
| Knob will not turn. | Could have pushed the knob in causing it to bind. | Check position of knob. Pull out if possible. |
| Table will not turn. | Thumb lock may be active. | Check thumb lock to make sure it's not engaged. |
| Could have pushed the knob in causing it to bind. | Check position of knob. Pull out if possible. | |
| Backlash adjustment mesh set screw tightened too much. May need to be backed off. | The set screw needs to be adjusted per Mesh Adjustment directions. | |
| Load is mounted touching the optical aperture. You don't want any load touching the center aperture as it will gall or wear causing binding. | Remount load keeping it away from the aperture. | |
| Motor stalls or table is loud. | Backlash adjustment mesh set screw tightened too much. May need to be backed off. | The set screw needs to be adjusted per Mesh Adjustment directions. |
| Too much play in the table. | Backlash is excessive. | The set screw needs to be adjusted per Mesh Adjustment direction |
| Table is loud when operating. | If an older table and travel distance is minimal but continuous repetition, it may not have enough grease causing bearing wear. | Remove red plug in top of table and rotate until the worm gear is visible. Add grease if necessary. |
| Table grinds or catches when turning. | Check environment. If in a dusty application such as grinding, dirt may be accumulating inside and cause abnormal wear on the bearings. | May need to be returned for repair, at a nominal cost. |
| If a wet application, water accumulating internally may have caused the bearings to rust. | May need to be returned for repair, at a nominal cost. | |
| If the table will be operated in a wet, dusty or otherwise dirty environment where contaminates may accumulate, inform your Velmex Application Engineer in order to quote based on special needs. This could reduce added cost for future repairs. | ||
| Motorized Table: Motor stalls or table is loud. | Backlash adjustment mesh set screw tightened too much. May need to be backed off. | The set screw needs to be adjusted per Mesh Adjustment directions. |
| Motorized Table: Motor cannot be removed. | May not have used a motor with 2 flats set at 90° on the shaft. | Reset with a motor with 2 flats set at 90° on the shaft. See Rotary Table Motor Attachment. |
Turntable Troubleshooting
| Symptom | Possible Cause | Possible Fixes |
|---|---|---|
| Table will not turn. | The locking knob (free motion control) may be engaged. | Check the free motion knob to make sure it's not engaged. |
| It is possible with extended use, the set screws in the bottom will back out. This may cause the top plate to touch or scrape the bottom plate causing galling. | Re-tighten the 2 set screws one after the other. The first screw will need to be removed from the center bottom to access the internal set screw. After tightening the internal set screw, replace and tighten the first screw. | |
| Rotation is not smooth or catches. | If mounted, it's possible the mounting screws are not sunk completely in the mounting holes and stick-up slightly from the base. | Check to make sure the mounting screws are below the top of the base. |
| Rotation is not smooth or is too free and will not lock for fine tuning. | If the top plate has been removed, it is possible the table wasn't reassembled correctly or the half-moon locking pin that presses on the shaft to control the smooth motion is out of place or missing. | Check the assembly instructions for the A2505T & A2505TS to make all components are there and in the proper place. You should not have to remove the top plate for the A4007T or A4007TS. |
VXM™ Stepper Motor Controller
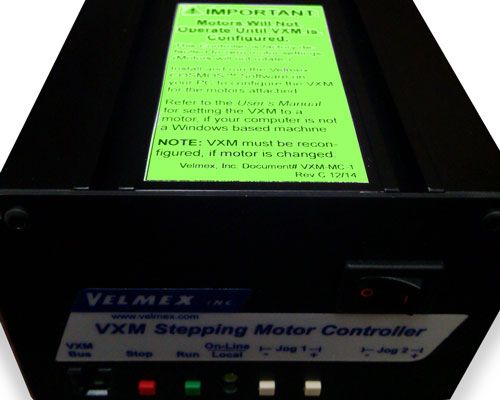 First - always read the Users Manual.
Whenever you have an issue with the VXM Controller controlling the motor(s), check to be sure the system is configured correctly. The VXM needs to be set-up to recognize the specific motor and axis it is controlling. Install and run COSMOS™ Configurator Software to program the VXM to properly operate the connected motors.
If the VXM does not appear to be controlling the motors properly, run diagnostics. First run the Serial Port Diagnostics. This will indicate whether or not you are communicating with the VXM Controller. If you are not communicating with the Controller, the system may not be configured correctly or you may have an issue with the communications port. Check both.
If the Serial Port Diagnostics runs correctly, but you still have issues, then run the COSMOS Systems Diagnostics. This can help you and Velmex Support, should you contact us, determine what the issue is and how to resolve it.
Issues with Equipment
| Symptom | Possible Cause |
|---|---|
| Power (Green LED) light does not come on. | Power supply not connected or AC cord not attached. Power switch not on. Circuit breaker tripped (white center protruding from breaker.) |
| Motor makes noise but is not moving (Stalled). | VXM not configured for Motor, speed too high, broken wiring, or jammed mechanism/motor. |
| Motor is not making any noise and is not moving (no power to motor). | Limit switches not connected or set for wrong type switches. |
| Circuit breaker trips when power applied to VXM. | Voltage >28 volts or polarity reversed. |
| Circuit breaker trips while running motor for a short time. | Wrong motor selected. Shorted wiring. |
| Circuit breaker trips while running motor for a long time | Wrong motor setting. Shorted wiring. Controller overheating from lack of ventilation or ambient temperature too high. |
| Controller is too hot to touch. (It is normal for Controller and Motor do get very warm when running continuously.) | Wrong motor setting. Lack of ventilation or ambient temperature too high. NOTE: Motor should always be mounted for heat conduction. |
| Motor runs erratically (at lowest speeds goes either direction, and has low torque at mid speeds). | Broken wire to motor or broken connector pin. |
| Motor always goes opposite direction. | Directions were inverted with the "setDM" command. Refer to the "getDM" and "setDM" command. |
| VXM resets itself and sends "EB" to the host. | A motor 3 or 4 command was sent to the VXM when there is not a second VXM connected to the VXM bus. |
| VXM continuously resets itself (flashes power light slowly) and sends "EB"s to the host. | A master VXM attempts communication with a slave that is off. |
| Power (Green LED) light flashes rapidly and continuously on power-up | Run, Stop, or a Jog input is pulled low. The VXM does not allow button Jog inputs to be activated at power up. (release button/input to recover.) |
| On-Line light flashing continuously (yellow LED). | RS-232 overrun error, host sent commands while VXM was busy sending requested data (power off/on to recover.) |
| Power and On-Line light flash rapidly and VXM sends "EM" to the host. | Program memory is full (send "K" to recover.) |
| Power and On-Line light flash rapidly and VXM sends "EL" to the host. | More than 10 nested Loop commands encountered per run (send "K" to recover.) |
| Power and On-Line light flash rapidly and VXM sends "EJ" to the host. | More than 4 nested "JMx"s encountered per run (send "K" to recover.) |
| Power and On-Line light flash rapidly and VXM sends "EC" to the host. | When "U9x" missing or motor not the same when continuous indexing (send "K" to recover.) |
Sound Indicators
The following are some sound bytes to help troubleshoot motor and controller operation.
| Description | Sound |
|---|---|
| The sound of a normal operating stepper motor: | |
| The sound of an overloaded motor: | |
| The sound of a motor when acceleration is set too high: | |
| The sound of a motor when the speed is set too high: | |
| The sound of a motor with a broken wire: |
VRO Readout Troubleshooting
First - always read the Users Manual.
| Symptom | Possible Cause |
|---|---|
| The carriage is moving but the Readout is not changing. | Check the plugs to ensure they are connected properly. |
| Check for any loose wires. | |
| The reading head may be too far from the encoder. Make sure they are in close proximity but not touching. | |
| Readout is showing the wrong unit of measure. | Check to make sure you are using the right encoder settings. Reset the scale. (All the encoders available from Velmex are programmed into the VRO Readout.). |
| The display is blank but light is flashing. | VRO has been put in sleep mode. To exit sleep press "U" button, or send any character in the Serial port. |
| Status light flashing rapidly and display shows partial information or odd characters. | Power is intermittent or was interrupted. Check power input connector and cycle power. |
| Status light pulsating and display shows ">5 INPUT VOLTS !" | Power in is greater than 5.4 volts, disconnect power adapter and check the voltage. |
| Power in is less than 4.6 volts, check power adapter voltage, and encoder load. | |
| Status light pulsating and display shows "Enc Input Fail !" | Poor encoder connection, electrical interference, or count exceeding 1.6 MHz. command. |
| It will not let me make setting changes. Displays "Not Settable". | VRO needs to be cleared (set to defaults) and the process restarted. |